
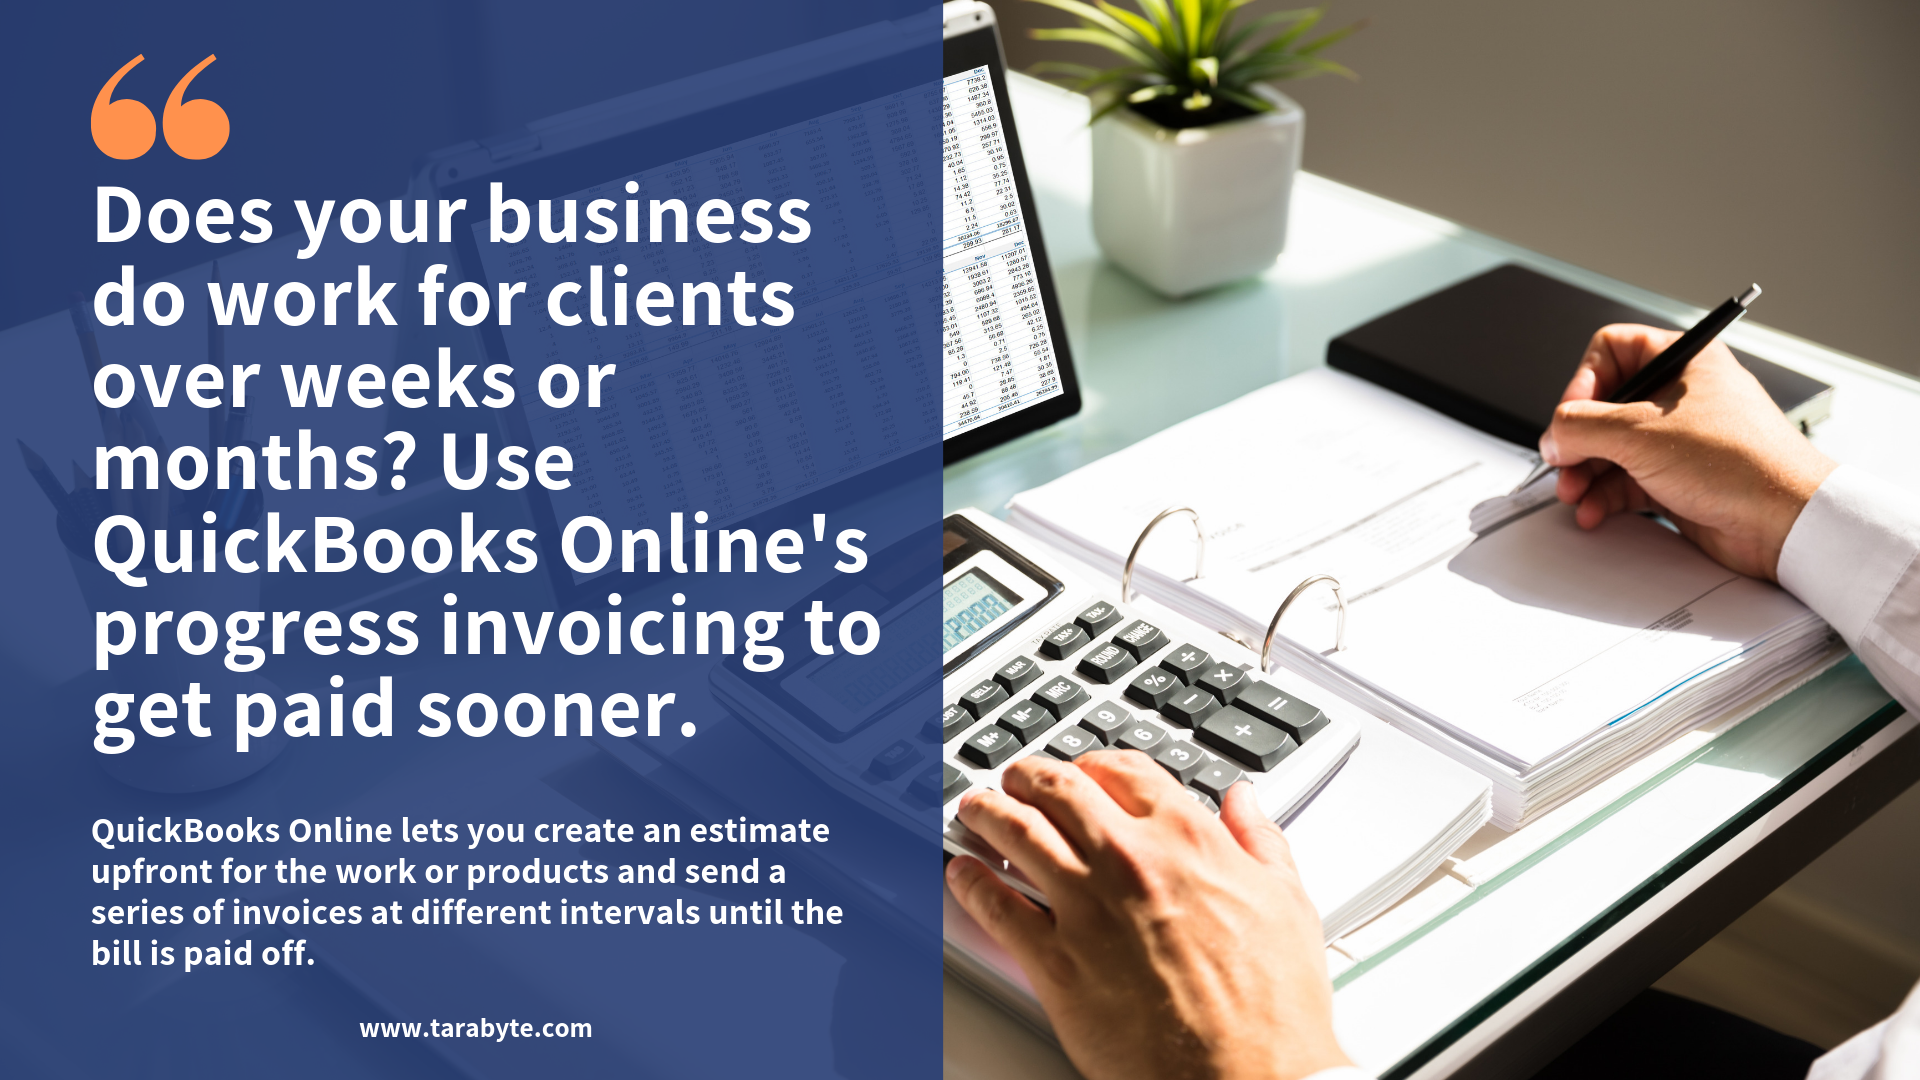
Does your business do work for clients over weeks or months? Consider using QuickBooks Online's progress invoicing.
Let's say you're doing a job or project for a customer that is going to take a long time, but you don't want to wait until you're finished to get paid. Or you've agreed to let a customer pay for something in multiple payments. QuickBooks can help. You can create an estimate upfront for the work or products and send a series of invoices at different intervals until the bill is paid off. This is called progress invoicing.
Creating a Template
You'll need to use a special template for progress invoicing. Click the gear icon again and select Custom Form Styles. In the upper right corner of the screen that opens, click the arrow next to New Style and select Invoice to open the design window. Replace the template name with a descriptive one and click Airy Classic to select it.
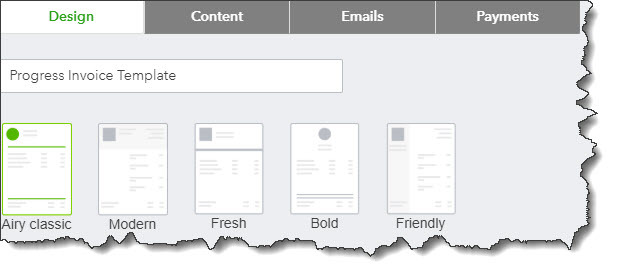
You'll need to select the Airy Classic template and give it a descriptive name.
There are other options on this page - lots of them. You can add a logo, change fonts and colors, and even modify the content on the invoice. Talk to us if you want to explore the possibilities.
Estimate to Invoice
QuickBooks can create both invoices and estimates. They're very similar, and you'll complete them in the same way, with one obvious exception: In addition to an Estimate date, you can also specify an Expiration date. Click the + sign in the upper right, select Estimate, and fill out the form. Save and close when you're done.When your customer has accepted the estimate and you've agreed on a payment schedule, you'll need to know how to create a progress invoice. Click Sales in the navigation bar on the left, then All Sales. Locate your estimate on the list and click Create invoice at the end of the row. This window opens:
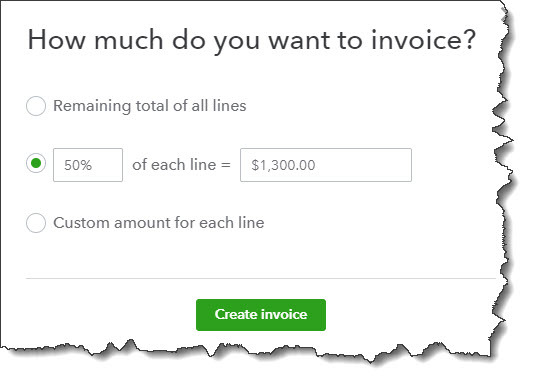
You have three options when the time comes to start your progress invoicing.
The invoice that opens will contain the information you provided on the estimate. You'll notice a new column here, though, labeled Due. Your calculated percentage will appear there if you chose that option. If you indicated that you wanted to enter a custom amount for each line, that field will say $0.00 of [total]. Go down that column and type in the amount you expect to be paid on each line item. When you've finished, Save the invoice and send it to your customer. Now it appears in the invoice list, where you can send reminders, receive payment, etc. You can send as many progress invoices as you'd like until you can finally bill your customer for the Remaining total of all lines.
QuickBooks provides a report so you can see the progress of all of your progress invoices at once. Click Reports and scroll down to Sales and customers to run Estimates & Progress Invoicing Summary by Customer.
Progress invoicing is a simple concept, but it requires many steps, as you've seen here. And there are other ways to go about it in QuickBooks. We strongly suggest that you let us help you with this task to make sure your invoices are set up correctly - and that you're paid in full.
.png "Untitled design (1)")
